Saturday, March 31, 2012

Deviled Chicks

Miss Linda turned 30 this weekend, so I thought I would bring a "seasonal" app....how cute are these guys ?!  Figured I would post, so everyone has something fun to bring to Easter next weekend :)  They were a HIT!!

Ingredients:
1 recipe of Deviled Eggs
Black olives, diced - for the eyes :)
1 carrot, diced - for the beak :)

Wednesday, March 28, 2012

Orange Chicken with Snow Peas

This was eh....I thought I would LOVE it cause I'm a sucker for orange chicken from Pei Wei....but I wasn't impressed.  I would  much rather have Thai Chicken with Jasmine Rice - but thought I would post this recipe in case others wanted to try it out :)
Serves 4-6: OBB cookbook

Ingredients:
2 teaspoons olive oil
3 cloves garlic, minced
2 teaspoons minced ginger or bottled minced ginger
1 /12 lbs boneless, skinless chicken breasts cut into 1-inch pieces
salt and pepper
2 tablespoons cornstarch
1/3 cup orange juice
1/2 cup orange marmalade
2 tablespoons soy sauce
1 1/2 tablespoons brown sugar
3 tablespoons rice wine vinegar
1/8 teaspoon red pepper flakes
8 oz fresh snow peas, trimmed of the string
Hot white rice for serving
Sesame seeds

Heat veggie oil in a large skillet or wok set to medium heat.  Add minced garlic and ginger and saute for 30 seconds.  Sprinkle chicken with salt and pepper and add to pan.  Stir-fry until chicken is cooked through, about 5 minutes.

While chicken is cooking, whisk together cornstarch and orange juice in a bowl.  Whisk in marmalade, soy sauce, brown sugar, vinegar, and red pepper flakes and set aside.

Add snow peas to chicken and cook for about 1 minute.  Add sauce to pan and increase heat if needed to bring to a simmer.  Cook for about 3-4 minutes or until sauce is thickened.  Serve over white rice and sprinkle with sesame seeds if desired.

Tuesday, March 27, 2012

Bacon-Wrapped Teriyaki Chicken Skewers

Dinner tonight was courtesy of my hubby - and YUMMY!!  Even though he had a little fight with the skewers and the grill - these turned out amazing!!  We had this with Lime Cilantro Rice - perfect pair with this meal!  Super good!!

Makes 8-10 skewers or 24-30 Appetizers:  OBB Cookbook

Ingredients:
8 oz bacon (not thick-sliced)
1 lb boneless, skinless chicken breasts
16 oz can pineapple chunks
1 recipe Teriyaki Sauce

Cut the bacon into thirds.  Count how many pieces you have and then keep that in mind when cutting up the chicken breasts.

Cut the chicken into bite-sized pieces; you'll want roughly as many pieces of chicken as you have of bacon.

Drain the pineapple and place in a bowl.  Set up a workstation with skewers, chicken, bacon, and pineapple - plus a shallow dish or heavy-duty zip lock plastic bag for marinating the skewers.

Wrap a piece of bacon around a piece of chicken and secure with a toothpick.  If making larger skewers, thread the meat all the way to the bottom.  Top with a chunk of pineapple.  For skewers, repeat twice so there are three pieces of bacon-wrapped chicken on the skewer.  Repeat with remaining chicken, bacon, and pineapple.

Reserve 1/2 cup of Teriyaki sauce and pour the remaining sauce over the chicken.  Marinate for 4-8 hours.

If you choose to cook these on the grill, preheat the grill to medium-high heat (about 400).  Place skewers on grill and baste with reserve teriyaki sauce.  Cook for 7 minutes, turn, baste, and cook for another 7 minutes.

To cook these in the oven - preheat oven to 300 and place on foil-lined baking sheet.  Cook for 20 minutes, turning and basting once.

Sunday, March 25, 2012

Spaghetti with Bacon, Brussels Sprouts and Artichokes

We needed something speedy tonight - and this was it!  Ross had been craving spaghetti - so I found this recipe...however, when he found out that the spaghetti I was talking about didn't have meat - he wasn't very happy...hehe.  BUT he LOVED it!!  SO :p  - don't need meat to make spaghetti great :)

Servings: 2 entrees, 4 sides

Ingredients:
1/2 lb spaghetti
4 slices thick sliced pepper bacon
1/2 onion, diced
2 cloves garlic, finely minced
1/2 lb brussels sprouts
6 1/2 oz jar marinated artichoke hearts
1/2 cup grated parmigiano reggiano cheese
salt, to taste

Bring large pot of water to boil. Salt water and add in pasta. Cook to al dente, drain and set aside.

In the mean time, in a deep skillet, cook bacon slices to your liking. Drain on paper towels. Pour off excess bacon grease leaving 2 tablespoons. {If your bacon didn’t give off enough grease, make up the difference in olive oil.} Saute onions, garlic, brussels sprouts and salt until tender, about 5 minutes.

Chop bacon slices into smaller pieces. Stir in artichoke hearts, bacon, hot pasta and cheese. Toss together, taste and adjust seasonings. If you find the dish is on the dry side, stir in some reserved pasta water or heavy cream.

Secret Message Egg

I went to my parents house last week for dinner, and I was going around looking at all the Easter decorations they have...and I got an idea!  We used to blow out eggs and decorate them - it was an inexpensive and fun craft to do....so I figured I would try it again.  While I was making them - I thought it would be cute to put little messages in them....how fun!!  Now Ross gets to hunt around our house for the next 2 weeks trying to find all the secret message eggs :)

Supplies:
Raw eggs
Needle / Hard boiled Egg Cooker
Syringe
Paper / Pen

Poke two holes in a raw egg - I used my hard boiled egg cooker to create the holes - but  a needle or nail would work too.  Put a smaller hole on one size - just one prick....and then on the bigger end double the size of the hole (this is where the egg will be blown out - and the message will go in.)


Then insert the syringe filled with air into the bigger side (be careful cause the pressure can break the egg really easily...) - and slowly release the air into the egg....this will cause the yolk to come out the same hole.  I kept doing this until nothing was coming out.

Then I filled the syringe with water - and put it on top of the smaller hole on top of the egg - and pushed.....as you do this, the yolk (yellow part) will start pouring out from the bigger hole.  I did this until it was water...

Then I stuck the eggs into the microwave for 10 seconds to dry them out....again, be careful - too long could crack them.

Write up your message - roll it tight, and insert it into the big hole.

I just wrote some stuff on the outside of the egg, but you could decorate them too!  Then I hid them around our house for Ross to find :)


To get the message - just crack it open!  Easter fun :)

Saturday, March 24, 2012

Banana Chocolate Chip Pancakes with Peanut Butter Syrup

Ahhhh so good!!  This was super filling - it's really rich with the syrup and the choc chips, but it's super good!!  I don't like pancakes - yeah, again - I'm weird!  But we had the nieces sleepover last night, so thought they would like these....and turns out - I do too!!  (as long as PB is in the syrup!)  Super yummy!!  We had a lot of leftovers though cause it's really filling!!

Friday, March 23, 2012

Parmesan & Ham Pasta

Had the nieces over for their xmas gift sleepover - so we thought we would make up a yummy meal from their "Kids Cookbook".  It is cute - it has steps that kids can help with and teaches them about measurements and stuff.  It was fun - and it was really good!  We added some extra yummy's, so try it out - really quick!
Serves 4-6

Ingredients:
 3/4 lb bow tie pasta
1 1/2 cup cooked ham
1 cup frozen peas
1 1/2 cup heavy cream
1/2 white onion
1/2 green pepper
shredded Parmesan cheese
Fresh parsley, cut

Boil pasta - when almost done, add the frozen peas for 1 minute.  Then drain both and set aside.

Heat heavy cream, onion, green pepper, salt / pepper in a sauce pan.  When starts to boil - add the cooked noodles / ham.  Mix until warm - then top with Parmesan cheese and parsley.

Then eat it up!!


Thursday, March 22, 2012

Deli-Style Corned Beef Sandwich

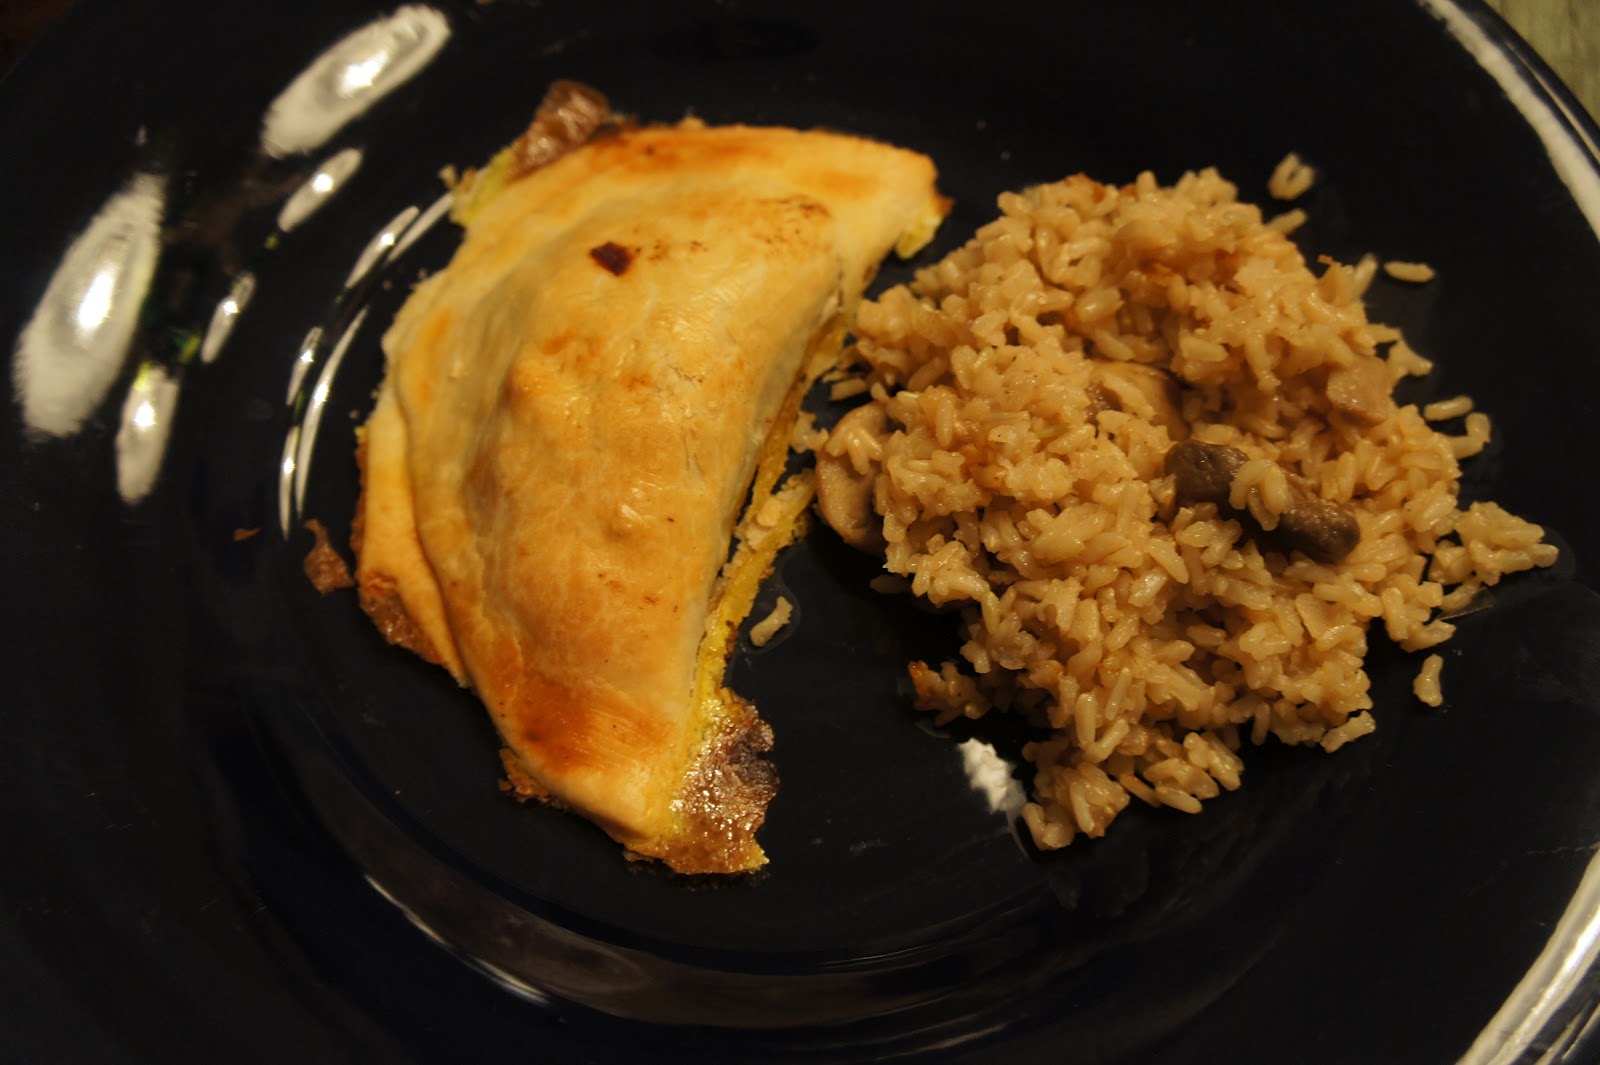
Who has leftover corned beef - we do, we do!!  What a perfect way to eat that leftover St. Patty's food!!  I don't think this is a Irish meal at all - but it did use the best Irish ingredient: CORNED BEEF!  This was amazing!!  It totally reminded me of the sandwich Ross had in New York at Carnegie Deli.

This was super quick and easy - we ate this up with some chips and a dill pickle!  So yummy!!!  We are very excited for the leftovers tomorrow!!  Even if you don't have any leftover corned beef - so buy some, it's dirt cheap after St. Patty's Day!!


Ingredients:
Corned beef (you can use leftover corned beef from a roast or just deli-sliced corned beef)
Sturdy bread; sourdough, rye, or sourdough rye is best
Swiss cheese

Place 1-2 slices of Swiss cheese on 1 slice of bread. Add corned beef and a few spoonfuls of coleslaw.

Broil, toast, or grill until cheese is melted and bread is toasted and serve immediately.

Coleslaw

Oh the slaw.....I am not a huge fan of coleslaw - think it's kind of a waste of a "salad", BUT we made Deli-Style Corned Beef Sandwich  tonight, and it called for the coleslaw as the topping - and well, I will admit it - it was really good!!  Guess if I don't like something, I just have to make it myself and I fall in love :)
Makes a lot - see pic!  OBB Cookbook

Ingredients:
1 cup mayonnaise
2 tablespoons Dijon or whole-grain mustard
2  tablespoons apple cider vinegar
2  tablespoons sugar
1/2 heaping teaspoon Kosher salt (or an even 1/2 tsp. of table salt)
1 tablespoons grated onion
2-2 1/2 teaspoon celery seed (absolutely essential for classic coleslaw flavor)
16-oz. bag shredded cabbage with carrots
1/2 minced green bell pepper
1 carrot, peeled and grated

Okay, peeps, this is rocket science. Combine mayo, mustard, vinegar, sugar, salt, onion, and celery seed. In a large bowl, combine shredded cabbage, carrots, and green pepper.

Toss with dressing and refrigerate for at least 2-3 hours and up to about 3 days (or when it's unjustifiably soggy).

Monday, March 19, 2012

Sweet and Savory Coconut Rice

I never will get sick of rice....when I was little, I used to just like white rice / butter / shredded cheese - and now I'm determined to find tons of different ways to eat one of my favorites starches!  This was super good - we ate this tonight with Pineapple-Ginger Flank Steak and Carmalized Green Beans.  We had Parmesan Chicken on Tuesday - and the leftover rice worked great with that meal too!
Serves 8: OBB Cookbook


Ingredients:
2 cups white or Jasmine rice
1 can coconut milk
2 cups water
1 teaspoon Kosher salt
Splash of white vinegar (optional, but it helps with the texture)
2-3 teaspoon white sugar
Handful of chopped green onions, plus chopped green onion tops for garnish
Black pepper to taste
Combine rice, coconut milk, water, salt, vinegar, and sugar in a saucepan and bring to a boil  Turn heat to low and cover for 20 minutes or until most of the liquid is absorbed.  Allow to stand 5 minutes.  Add green onions, black pepper (if desired), and additional salt if necessary.  Serve with any Asian or tropical-inspired food.

Caramelized Green Beans

These were really, really good (man, I need to find more descriptive words for "yummy").  This was a little putsy to make -so make sure you have an extra set of hands to help out (thanks babe!)  We ate these with Pineapple-Ginger Flank Steak.
Serves 6-8: OBB Cookbook

Ingredients:
1 lb fresh green beans
1/2 lb bacon
1/2 red onion, sliced
3-4 cloves garlic, minced or pressed
olive oil
2 tablespoons sugar
2  tablespoons soy sauce
1/2 teaspoon Kosher salt
Lots of freshly-ground pepper

Begin frying the bacon in a large skillet. Start boiling a large pot of water. Place beans in a colander and rinse them well. Then snap the ends off and snap them in half.

Prepare the sauce by mixing sugar, soy sauce, and salt in a small bowl.

Make sure your onions are sliced, garlic is pressed, and everything is ready to go. Remove bacon from pan and drain on a paper towel. If you feel like it, you can crumble it now or wait until it’s cooled off a little. Pour bacon drippings out of pan.

Return a couple tablespoons of bacon drippings to the pan. Otherwise, just use some olive oil and heat pan to medium-high heat. When the pan is hot…
–Add onions and garlic. Give them a quick stir and then…
–Add beans to boiling water. Place colander in a clean sink. Boil for one minute; you’re not cooking them until they’re done, just blanching them to take the edge off. Meanwhile, stir the onions and garlic so they don’t scorch. After one minute, drain beans in the colander in the sink.

Once beans have been drained, add them to the onions and garlic. Stir fry 2-3 more minutes.

Give your sauce a quick stir and then pour on top of the beans. Keep stir-frying until the beans get kind of glazy. Do this for another 2 minutes.

Add crumbled bacon and lots of freshly-ground pepper to the beans. Keep stir frying until the sauce sticks to the beans and the bacon. Transfer to a serving dish and allow to stand a few minutes so the beans cool down a bit and the glaze thickens up a little.

Pineapple-Ginger Flank Steak

"Flank steak....how come??"  Well Ross - cause it's AMAZING!!  This was super easy to make - just remember you have to make / marinade the night before....but I will tell you from experience - it tastes just fine only marinading for an hour :)  We made this with Sweet and Savory Coconut Rice & Carmalized Green Beans.
Serves up to 8 - OBB Cookbook

Ingredients:
1/2 cup brown sugar
1/2 cup olive oil
1/2 cup soy sauce
1 cup pineapple juice
1 tablespoon freshly grated ginger
4-5 garlic cloves, finely minced
up to 2 lbs flank steak

Combine first 6 ingredients for the marinade. Whisk together until combined. Remove 1/4 cup and set aside.
Score flank steak with a knife diagonally on both sides. This just means to run a sharp knife through it in the pattern below. You don’t want to actually cut through the steak, just lightly score- like 1/8 inch- into it. This will help tenderize the meat.

Place steak in large ziploc bag and pour marinade (excluding the 1/4 cup you set aside) over it. Refrigerate 8 hours or overnight. Take out of fridge 30 minutes before grilling. Place steak on grill and cook for 5-10 minutes per side, depending on the size. Use the 1/4 cup marinade you set aside to brush over steak in the last few minutes of grilling. (That’s a little trick I use for pretty much any meat that has a marinade just to splash it with an extra punch of flavor at the end) Flank steak should still be pink in the middle when done.

Remove from grill and let stand for 5 minutes before cutting so the juices can redistribute. Always cut flank steak against the grain, in thin slices to serve. (If you’re not sure what it means to cut against the grain, check out the flank steak post)


*If you don’t have a grill, the other way to cook a flank steak is under the broiler (please don’t anyone just pop it in a frying pan. Not good.) Place on a broiler pan on the upper rack and broil for about 5-10 minutes per side depending on the size. Because this particular marinade has sugar in it, you’ll want to watch carefully so it doesn’t burn. If you see the sugar burning too much, then you might want to move your rack down.

Saturday, March 17, 2012

Happy St. Patrick's Day

I'm a sucker for holidays!!  I have my mom to thank for my holiday obsession :)  We always had a totally GREEN themed breakfast, lunch, and dinner on St. Patrick's Day - and well, the apple doesn't fall from the tree :)
I'm a very lucky girl who is blessed to be married to my best friend!  Rossy is a great man, and I want him to always know how I feel about him!  We are headed to St. Paul for today's festivities - but I had to do something for him!!  What a fun treat for breakfast :)
We had Ross's parents over later for dindin tonight - and we made up Corn Beef and Cabbage - it was soooooo good!!  Ahhh what a crazy day!!  I love that it finally fell on a weekend!!  WOOT WOOT -- HAPPY ST. PATRICK'S DAY TO ALL!!

Friday, March 16, 2012

Cookie Sundae Cups

So Ross has been craving cookies and cream - so I decided to look for a recipe.  This is now his "favorite dessert of all time".  Now I would rather eat cookie dough plain usually - but I have to admit, this dessert was insane!!  The cookie on the bottom is like the prize for getting through all the yumminess :)  Ahhhhh we are going to be eating this every night!

Oh and we totally made the toppings by hand - check out those recipes.  WAY better than store bought stuff!!

Ingredients:
Chocolate chip cookie dough
Vanilla ice cream
Buttermilk Caramel Sauce
Hot Fudge Sauce

Preheat oven to 350 degrees.  Fill ungreased ramekins about 1/2 full of cookie dough.

Bake for about 12-14 minutes or until golden around the edged but still soft in the middle.

Remove from the oven and allow to cool about 5 minutes.  Top with a scoop of vanilla ice cream and drizzle with sauces.

Hot Fudge Sauce

So I'm not a fan of chocolate - yup, I said that!  BUT BUT my hubby loves himself some chocolate - so I made up the real deal tonight for the special treat: Cookie Sundae Cups 

Makes 2 cups - OBB Cookbook

Ingredients:
3 oz semisweet or dark chocolate (1/2 cup chips)
1/4 cup butter
1 can sweetened condensed milk

If you're using squares of chocolate, chop into smaller pieces.  Set aside.

In a small saucepan, heat the butter and condensed milk over medium-low until the butter melts and the milk is warm.  Add the chocolate and stir until the chocolate is completely melted and smooth.  Remove from heat.

Serve as desired.  Store leftovers in an airtight container for 1-2 weeks.

Buttermilk Caramel Syrup

We made this to top Cookie Sundae Cups- um, it was soooo good!!!  It's not healthy at ALL - but it probably the best sauce I've ever put on top of my ice cream, um ever!!!

Makes 2 cups - OBB Cookbook

Ingredients:
3/4 cup buttermilk (TIP: Take1 tablespoon of white vinegar - and add enough milk to make 1 cup.  Mix - and let sit.  Then you have your buttermilk to use)
1 1/2 cups sugar
1/2 cup real butter (no subs!!)
2 tablespoons corn syrup
1 teaspoon baking soda
1 teaspoon vanilla

Combine buttermilk, sugar, butter, corn syrup, and baking soda in a 4-quart pan.

Bring mixture to boil and reduce heat to low - just make sure it's still bubbling.  Cook, stirring frequently, for 7-9 minutes or until the syrup reaches a rich golden brown.  Remove from heat and stir in vanilla.

Pesto Pasta with Roasted Tomatoes

Went to take a ride in Pee Wee tonight, so we didn't get home till like 7 - and I was STARVING!  This made 2 servings at our household tonight -- haha!!  but it was so quick and easy, so we were eating right away!  ahhh I want more....!!

Makes 4 main dish servings / 6 side dish servings: OBB Cookbook

Ingredients:
1 pint cherry or grape tomatoes
8oz mushrooms, sliced (about 3 cups)
3-4 tablespoons olive oil
salt / pepper
8 oz bow tie pasta (a little more than 3 cups)
1/4 cup pine nuts
1/2 cup pesto
1/2 cup freshly shredded Parmesan cheese

Preheat oven to 425 - bring a large pot of water to boil.

Place tomatoes and mushrooms on a foil-lined baking sheet and drizzle with olive oil.  Toss with your fingers, making sure everything is coated with olive oil.  Sprinkle lightly with kosher salt and freshly ground pepper.  Cook for 12-15 minutes or until tomatoes look plump and some of the skins just start to split.

When the water comes to a boil, add 2 teaspoons salt and pasta to the water and cook according to package directions.

While the pasta is cooking, place the pine nuts in a small skillet over medium heat.  Stir frequently until the nuts turn golden brown and look slightly glossy, about 7-9 minutes.

To assemble, toss the hot drained pasta with pesto and Parmesan cheese.  Top with tomatoes and mushrooms and sprinkle with toasted pine nuts and additional Parmesan cheese if desired.

Thursday, March 15, 2012

Crispy Coconut Chicken Fingers

Um we just made our own chicken fingers....what what!!  I don't know why that always seemed so difficult, but it did -- haha!!  This was super easy (once we found the coconut flakes...hehe) - and it  tasted "restaurant worthy".  And the Sweet and Sour Sauce sauce - HELLO!!  It was so good!!  If you don't like the sweet and sour taste - good old Ranch / BBQ would be just as tasty!  We made this with these yummy Garlic Steak Fries.

Sweet and Sour Sauce

We had this yummy sauce with Crispy Coconut Chicken Fingers - and yum!!  I didn't really have a name for this, but it reminded me a lot of sweet and sour sauce - so YAY!!  I'll keep thinking of other stuff you could eat this with!


Ingredients:
1 cup apricot-pineapple preserves
2 teaspoons soy sauce
1/2 teaspoon Dijon mustard
1/8 teaspoon curry

Whisk everything together and serve!

Garlic Steak Fries

Fries in the house!  ahh can't go wrong with fries!!  This dipping sauce is like tongue candy :)  Do it up!  Had these with Chicken Fingers - soo good!


Ingredients:
2 1/4 teaspoon garlic salt
1/2 teaspoon parsley
1 teaspoon salt
1/2 teaspoon pepper
2 tablespoon olive oil
4 medium russet potatoes, washed

Fry Sauce:
1/4 cup real mayo (no miracle whip!)
1/4 cup ketchup
2-3 teaspoons dill pickle relish

Preheat oven to 400.  Mix spices in a medium bowl.  Add olive oil and combine well.

Cut the potatoes into lovely fry-shape wedges .  Add potato wedge to seasonings and toss to coat.

Lightly crumble some foil and place it on a baking sheet.  Spray the foil with nonstick cooking spray and then arrange potato wedges on foil.  This makes clean up easy because your potatoes won't stick, and it also ensures that they're cooked evenly.

Bake for about 40 minutes.  Then whisk fry sauce ingredients together and serve with fries.

Tuesday, March 13, 2012

Lemon Orzo Salad

I'm all about quick and easy this week - and this was probably the fastest thing out there!  And it was healthy!! And it's like 75 out - so we get to eat outside!!  This is such a crazy March!!  Ahhh but back to the food - this was great :)


Ingredients:
12 oz orzo
1 bunch fresh asparagus, cut into 1-inch pieces
1 pint grape or cherry tomatoes, halved
1 lemon, zested and juiced
4 tablespoons extra virgin olive oil
1 clove garlic, minced
2 tablespoons fresh parsley, minced
Kosher salt
Fresh ground pepper
Grated Parmigiano Reggiano

Bring 2 large pots of water to boil.  Add a big pinch of salt in each.

To one pot, add asparagus and blanch, about 2 to 3 minutes, depending on the thickness of your asparagus.  Place blanched asparagus in a bowl of ice water to stop the cooking and keep them green.

To the second pot, add the orzo.  Cook per package instructions.  When tender, drain and place in a large bowl.  Add blanched asparagus and tomato halves.

Mix olive oil, lemon zest, lemon juice, garlic, salt and pepper in a small bowl.  Stir into orzo and vegetables.  Stir in parsley and grated Parmigiano Reggiano.

This can be served warm, room temperature or cold.

Monday, March 12, 2012

Pork Tenderloin with Chimichurri

I found another quick / easy week night meal -- woot woot!!  This was so good!!  It made even better leftovers too - I look so fancy at work heating up my yummy meals!  We made this with brown rice - but I think it would be really good with Black Beans or Lime / Cilantro Rice!  Give it a try - super fast!
4 oz per person - OBB Cookbook

Ingredients:
2-3 lb pork tenderloin (2 small-med pork loins)
1 1/2 cups chopped parsley
1 1/2 cups  chopped cilantro
1/2 cup loosely packed oregano leaves*
2 tablespoons fresh lime juice
1 tablespoon red wine vinegar
3 tablespoons chopped garlic (6-7 cloves)
1 teaspoon kosher salt
1/4 teaspoon black pepper
1/4 teaspoon red pepper flakes
1/2 cup extra virgin olive oil

*Fresh is best, but if you don't have access to fresh oregano, you could use fresh cilantro and parsley and add in 1 Tbs plus 1 tea  dried oregano leaves.

Place pork tenderloins in a zip lock bag and set aside.

Place parsley, cilantro, oregano, lime juice, vinegar, garlic, salt, and pepper in a food processor.  Pulse several times until finely chopped.  Remove mixture and place in a bowl.  Add red pepper flakes and then stir in olive oil by hand.

Remove 1/2-3/4 cup chimichurri (the herb mixture you just made) and place in bag with pork tenderloins.  You just need enough to coat them well.  Be careful to not cross-contaminate since you will be serving the remaining chimichurri over the top of the finished meat.  Seal bag and set aside to marinade for about an hour or longer if you need to.  Place plastic wrap over the remaining chimichurri and set aside until ready to serve.

When ready to cook, preheat grill.  Remove tenderloins from bag and let excess marinade drip off.  Place on grill and cook for about 5-8 minutes before flipping to the other side.  You want the internal temp to be about 160 degrees, so check with a thermometer and take it off the grill when it reaches 155-158 since it will continue to cook a bit as it sits.  Remove from grill and let stand 5 minutes before cutting.  Slice, and serve with remaining chimichurri drizzled on top. 

Sunday, March 11, 2012

Broccoli Cheese Soup

This soup was quick to make - but it wasn't my all time favorite soup.  It was good, but it wasn't awesome - and some of the other soups on my blog are better!  I totally thought it would be more green too - thought it would be an easy thing to make for St. Patrick's Day.


Ingredients:
16 oz package frozen broccoli
¼ teaspoon salt
1 stick butter
1 small onion, chopped
1 cup water
3 heaping teaspoons cornstarch
1 can cream of celery soup
1 can water
6 cups milk
1 pound Velveeta Cheese
Toppings: Garlic / cheese croutons

Cook frozen broccoli as per package directions adding salt to the water.

In a large saucepan melt butter and stir in onion. Saute until translucent and tender.  Add drained broccoli to the saucepan. In a cup stir cornstarch and 1 cup water - Add to broccoli mixture (this will start to thicken the mixture).

Keep heat on low and add soup and 1 can water.  When mixture starts to simmer (if it boils turn it to a simmer) add milk and cheese cut in chunks.  Stir until cheese melts.

You can serve it this way or use your immersion blender to make it smoother.  Serve hot with garlic and cheese croutons on top.

Saturday, March 10, 2012

Natchitoches Meat Pies

Masters over for dindin - so while the boys played video games, us ladies made up a yummy feast!  We had this with Baked Mushroom Rice and had Caramel Apple Cider for dessert!  This took a little bit of time to make - but with 2 people, it went by fast and was totally worth it!  These were AMAZING!  My only recommendation is to try to add more of the meat mixture to each pie - the more stuffed, the better!

Makes about 12 6″ pies or lots and lots of small (biscuit cutter) pies - OBB 

Ingredients:
1/2 lb lean ground beef
1/2 lb ground pork
1/2 green pepper, chopped
1/2 red pepper, chopped
1 onion, chopped
2 stalks celery, chopped
5-6 cloves garlic, minced
2+ teaspoons Tony Chachere’s Creole Seasoning / Cajun seasoning
Tabasco sauce to taste (start with about 1/4 teaspoon)
1 can beef broth
3 (9 inch) pie crusts
1 egg
1/4 cup cold water


In a large skillet, brown ground beef and ground pork, breaking the meat into small pieces. When it’s about halfway cooked, drain excess fat (if necessary) and then add green and red peppers, onion, celery, and garlic. Cook until vegetables are tender and onions are translucent.

Add 2 teaspoons Cajun seasoning and 1/4 teaspoon Tabasco. Add beef broth and bring the mixture to a boil over high heat. Cook for about 20 minutes or until most of the liquid has evaporated. Season with additional Tony’s and Tabasco if necessary, keeping in mind that the seasonings will mellow in the pie. You can refrigerate this mixture for 3-4 days before baking the pies.

Prepare pie crust and roll the entire ball onto a floured surface. For large (meal-sized) pies, I use a bowl that’s about 6″ across the top; I just invert the bowl onto the dough and trace a knife around it to cut the dough.


Place about 1/4 cup of the meat mixture onto one half of the dough circle, keeping about a 1/2″-1″ margin from the edges.

Fold the other side over and gently pinch the edges shut.

For the decorative edge, you could crimp the edge with a fork or use your fingers to flute the edges.

Preheat oven to 400 and spray a baking sheet with non-stick cooking spray.  Place prepared pies onto your baking sheet. In a small bowl, whisk together egg and cold water and brush over the pies.

Bake 25-30 minutes or until golden brown.

Allow to cool a few minutes and then eat as soon as humanly possible. So good. There are…no words.

FREEZER INSTRUCTIONS: You could do this one of two ways; you can freeze them unbaked and just add the egg wash and bake them for an extra 15-20 minutes, or you can bake them and heat them up in the oven or microwave, whatever suits your needs better.

Baked Mushroom Rice

Apple juice and beef broth goes in rice....hmm ok!  This was so, so, so good!!  Such a twist to your typical brown rice - but worth the extra time to make!  We made this with Natchitoches Meat Pies - perfection combo!
Serves 8 - OBB cookbook

Ingredients:
2 tablespoons butter
1/2 cup onion, chopped
1 cup sliced mushrooms
3 cups beef broth
1/2 cup apple juice
1 tablespoon white vinegar
3/4 teaspoon salt
1 teaspoon pepper
2 cups uncooked long-grain rice

Preheat oven to 375.  Spray a 9x13 pan with nonstick cooking spray and set aside.

Melt butter over medium heat.  Add chopped onion and cook, stirring frequently, for about 2 minutes.  Add mushrooms and continue cooking until the onions are translucent and the mushrooms are tender.  Remove from heat and combine the remaining ingredients in the pan.

Transfer the mixture to the prepared 9x13 pan.  Cover tightly with aluminum foil and bake for 45-60 minutes or until the liquid is absorbed.  Stir before serving.

Caramel Apple Cider

So I really only like to drink diet coke, but that's getting old (yes...I said it!).  So when I found this recipe I got really excited!  This was such a great warm drink! The whipped cream, caramel sauce, and cinnamon on top was AMAZING too!!
OBB Cookbook

Ingredients:
1/2 gallon apple cider (64 oz or 8 cups) **Get cider...totally different than apple juice
1/2 cup orange juice, fresh squeezed or good quality bottled like Simply Orange
1 orange
8 cloves
2 cinnamon sticks (if yours are more than a year old- buy new ones!!)
1/4 teaspoon ground allspice
1/3 cup jarred caramel sauce* more to taste if needed
Sweetened whipped cream
*For a delicious twist, substitute maple syrup for the caramel sauce in this recipe.

Pour 8 cups of apple cider into a large stock pot on the stove pot. Set heat to medium-high. Add orange juice, cinnamon sticks, and allspice.

Thoroughly wash your orange and then gently stab the whole cloves into it. If you find it hard to do that without destroying the cloves, use a toothpick to poke little hole first and then insert the cloves.  (If you are doubling the recipe, you can still just use one orange, just double the number of cloves you poke into it).

Gently drop the whole orange into the pot. Bring cider to a boil and then reduce heat to a low simmer. Simmer on low for 60 minutes and longer if you wish. If you’re keeping the pot on the stove for an extended period, keep an eye on the orange. If at any time it splits open, remove it from the pot. If the white pith is exposed it will add a bitter taste to your cider. If you’re going to have the pot warming for hours on end, take out the orange. After you’ve simmered for an hour, add caramel sauce and stir to combine and dissolve. Add more caramel to taste if needed.

When ready to serve, ladle into mugs, top with whipped cream, and give it a drizzle of caramel and a sprinkle of cinnamon.

Cheese Egg Souffle

Hey Greens - remember Easter at Grandma's?!  I finally made the other egg dish we always used to eat!!  This isn't as good as egg bake, but it reminds me of my childhood and tastes amazing!  I was thinking of adding some mushrooms next time - I think that would be really good!  Of course Ross thinks we should add meat...haha....but then it really would be egg bake!  Super yummy - and really easy to make!

Great Aunt Helen Wallner

Ingredients:
12 slices bread - cut off crust
1 cup shredded cheddar cheese
11 eggs
4 cups milk
1 teaspoon salt
1 teaspoon dry mustard
1 teaspoon Worcestershire sauce

Put 6 slices of bread in buttered 13x9 pan.  Put 1/2 of cheese on top - 6 more slices of bread and the rest of the cheese.

Beat eggs with salt and dry mustard.  Add milk and Worcestershire sauce.  Pour liquid over all and sprinkle with paprika.

Cover with foil and refrigerate overnight.  

Remove 1 hour before baking.  Bake 1.5 hours at 325 - uncovered.  Can be left in oven for awhile to keep warm.

Friday, March 9, 2012

Manicotti

Another Friday of Lent - and talk about the perfect meal!  This manicotti was perfection - totally reminds me of the Lake!  Doesn't get much better than cheese, more cheese, and more cheese!!  Miss Nicole is in the house tonight - so she brought this super yummy salad to go with the manicotti!!  Ah this meal was amazing!

Aunt Barb recipe

Ingredients:
1/2 lb diced mozzarella cheese
2 lbs ricotta cheese
2 eggs
1/2 cup Parmesan cheese
pepper and salt
parsley
1 box manicotti (cook as on box)
Ragou sauce

Cook manicotti noodles as on box.  I only cooked for about 6 minutes, so they weren't too mushy.


Mix everything together; fill tubes with a long spoon.  (I put them back into the container - it worked perfect!


Put a little ragou sauce in a 9x13 pan - put noodles on top - and then cover with ragou sauce.   Sprinkle a little more Parmesan cheese on top.


Bake at 325 -350 degrees uncovered for 30 min. 

Shamrock Milkshakes

We had cookbook club tonight and we had a GREEN theme in honor of St. Patrick's Month - so check out our lovely menu:


Appetizer: Shamrock Nachos
Dessert: Shamrock Shakes


Everything was so good and so shamrocky :)  Who needs to spend $$ at McDonald's getting shamrock shakes...not this girl - we found the recipe and made our own!!  These shakes were so good - and it takes like 5 seconds to make!!
Altered from McDonald's recipe

Ingredients:
2 cups vanilla ice cream
1 1/4 cups 2% low fat milk
1/4 teaspoon mint extract
8 drops green food coloring

Combine all ingredients in blender and blend on high until smooth.  If needed, stop blender and stir with a spoon to help blend in ice cream.  

Pour into 12-oz cups and serve each with a straw.  (a GREEN straw...that's right....)

Shamrock Nachos

We started out cookbook club tonight with this fun/festive appetizer!!  I was trying to brainstorm for some green food for our menu this week, and I thought of these tortillas and got really excited!  This actually turned out really good....even though we burned a few! - but that's what cookbook club is for...to try it out before the real deal!

Anyways, this was super easy - and super yummy!!  You can always add lots more nacho toppings, but being that we had a lot on the menu we stuck to adding some more green!!

Ingredients:
Garden spinach and herb tortillas
Olive Oil
Sour cream
Shredded Cheese
1 avocado

Heat oven to 350.

I used a shamrock cookie cutter and cut out our "chips" from the tortillas.  Spread olive oil on both sides - put on a cookie sheet - and put in the oven for about 5 minutes.  I would just keep watching until they start to look crisp...we left ours in a little too long and burnt a few.

Then just cut up some avocado - and spread cheese on top of the "chips" and put in microwave for 30 seconds until cheese melts...and SHAMROCK NACHOS!!  What what!!


Saturday, March 3, 2012

Tater Tot Bake

Had the rents over for dindin tonight, since we thought we were going to be at the cabin snowmobiling....what's up Mother Earth?!  You give us snow - and then you make it like 40 degrees out and melt it all :(

Anyways, we made up these AMAZING potatoes with Babyback Ribs - and um....HELLO!!....SO GOOD!! I didn't think life got much better than Cheesy Hashbrowns, but this was a close first!!  This was a twist on your typical cheesy potato recipe - used tater tots instead of hash browns...and rice puff cereal instead of corn flakes and YUM!  It's not healthy at all.....but totally worth the lbs :)

Recipe / day

Ingredients:
2 lb package frozen tater tots
8 oz cheddar cheese, grated
2 (10.7) cans cream of chicken soup
2 cup puffed rice cereal
8 oz sour cream
2 sticks butter

Preheat oven to 350.

Melt 1 stick of butter in 9x13 glass pan and add package of frozen tater tots.  Mix butter and potatoes well.

Mix together cream of chicken soup and sour cream - and pour over the tater tots.  Sprinkle 4 oz of cheese on the top of that.

Mix 1 melted stick of butter with puffed rice cereal and spread over mixture.  Top with 4 oz of cheddar cheese.

Bake 30-34 minutes or until bubbling and brown.

Friday, March 2, 2012

Zucchini Ribbon Salad

First Friday of Lent, so we made up some yummy Lake of the Woods Walleye (thanks for catching hon!) and this yummy salad!!  This salad was SUPER easy to make - and it was gone in about 2.2 seconds!!  I think it would be good with red onion too - or maybe some craisins or something!!


Ingredients:
Arugula
2 zucchinis
Toasted hazelnuts (or pine nuts....slivered almonds)
Feta cheese (or shaved Parmesan...)

Dressing:
1/3 cup red wine vinegar
1 cup olive oil
1 tablespoon Dijon mustard
1 garlic clove, crushed
salt / pepper
dash oregano

I cut the ends off of your zucchini - then used a veggie peeler and cut the zucchini into thin lengthwise strips (stopping and turning when you see the seeds....)

Cook your strips of zucchini either in a stove top grill or saute pan coated with a tiny bit of olive oil - only takes a couple of minutes.  Make sure it cools completely before adding them to salad.

Then just mix zucchini, arugula, nuts, and cheese together - and top with dressing....YUMMY!!

Thursday, March 1, 2012

St. Patrick's Day Wreath

YAY more St. Patrick's Day decorations!!!  I barely had any decorations - and that makes our house so boring for March.....

This was so, so, so cheap!!  haha  I literally took a hanger and had Ross shape it into a circle....how creative is that ?!  ahhh just the thing for those stupid wire hangers!!!  Anyways - this is super easy and super cute!  I went to Mill End Textiles in EP to get the fabric - $5.00  Where else can you get a cute wreath for $5....um no where!

Supplies:
Hanger (hehe) OR foam / wire 8" wreath
Fabric (I used 10 diff patterns)
Ribbon

I got the 10 different fabric patterns cut to 9" x 21" - at Mill End Textiles.
I then cut each strip into 1" x 9" - I didn't really measure every one ....sort of just eye balled it.

I then used a hanger (ahhh I love it) - but otherwise, just go to Michael's and get a 8" wire wreath (if you do foam - I would recommend cutting your fabric longer).


Then just start tying the fabric into knots around the wreath - and BAM -- You have a St. Patrick's Day wreath!  To get it to hang - I just took some St. Patty's ribbon and tied it off.....cute huh?!

Fried Egg Sandwich

So I've been taking heat for putting "simple" recipes out here...I think the joke was that I should put a peanut butter and jelly sandwich as a post.....well :p to you!

I'm putting this sandwich out here (and I'll continue to), because you don't always think of such easy and yummy meals - and I want it on our radar for the next time we're looking for something simple.  This was super good!!
L-to the-Sodahl idea

Ingredients:
Bread
Avocado (sliced)
Tomato (sliced)
Fried egg
Miracle Whip
Cheese (optional)

Fry up your egg.....toast your bread.....spread some miracle whip on that bad boy - and then top the ingredients on!  So good :)

St. Patrick's Day Centerpiece

It's "St. Patty's Month" - so I thought I would share some super easy / inexpensive ideas!!  I'm all about cutie decorations - and the cheaper the better :)  This was probably the easiest idea I've ever thought of!!  I just happened to already have the candles and the ribbon, so it made it really cheap - BUT even if you had to buy both, it's still a cheap idea...and look how cute it makes the table look!!

Supplies:
Green candles
Ribbon
Brads

All I did was wrap some fun/festive St. Patrick's Day ribbon around some green candles - and secured the ribbon with scrap booking brads.....and DONE!!  Lovely green centerpiece all ready for St. Patty's Month :)