Wednesday, July 31, 2013

Baby Food - Plums

So Brody has been constipated lately, so figured we would try some plums to get things moving.  My ped doc told me "P foods = Poop"  :)  Watching Brody eat this was hilarious - so I had to include the video...too funny!!

One whole plum yields about four ounces of puree.

Fresh plums, or prunes, are an excellent defense against constipation. A ripe plum will smell sweet at the stem and give slightly when you squeeze it; the color can vary and isn't a good indicator of ripeness. Look for fruit that's free of nicks, bruises, and other blemishes. Prunes are a great alternative when fresh plums aren't in season.

Wash the plum with a mixture of three parts water and one part white vinegar to remove bacteria. Rinse under cool running water and dry.

Bring water to a boil in a medium saucepan and then add plums to the water for about 45 seconds. With a slotted spoon, remove plum from boiling water and plunge into an ice bath immediately. After plum has been fully submerged, remove and peel the skin with your fingers or a sharp paring knife.

Slice plum in half, lengthwise, working your way around the pit. Twist and pull the plum halves apart. Use a spoon to pry out the pit, or stick the blade of a sharp knife into the pit and twist until the pit pops out. Slice each half into even-sized slices then quarter each slice

Puree plum in a food processor or blender until smooth. Add water as needed to reach desired consistency.

Cool plum puree and refrigerate leftovers for up to 3 days. Freeze leftovers for up to 3 months. Thaw overnight in your refrigerator.

Wednesday, July 24, 2013

Baby Food - Peas

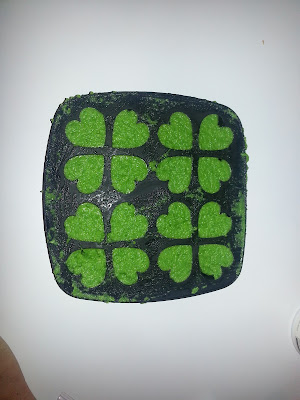
Brody LOVED these!!  I was kinda surprised....I didn't think he would for some reason, but he kept wanting more - and every time he ate them he finished the serving!!

2 cups peas = 20oz

You baby is ready for vegetable purees after she has mastered single-grain cereal. Pediatricians generally advise that you start with green veggies since they're less sweet than yellow veggies and fruits (if baby has the sweet stuff first she might be less willing to eat foods that aren't sweet). Mild peas are delicious alone or mixed with a variety of other veggies (and even yogurt). You can make pea puree with fresh or frozen peas. Buy fresh in the spring and look for pods that are intact and have a bright green color. Avoid canned peas -- they're filled with sodium.

If you decide to use frozen peas, skip this step and move to the next. If you choose to use fresh peas, remove from pod, place in a colander, and rinse with cold water.

Place the peas in a steamer and cook for 3 to 5 minutes, or until tender. Drain peas and rinse with cold water for three minutes to stop the cooking process.

Puree peas in a food processor or blender until smooth. Add water as needed to reach desired consistency.
For chunkier pea puree, which is ideal for babies 10 months or older, mash the peas with a potato masher instead of pureeing them.

Cool pea puree and refrigerate leftovers in BPA-free containers for up to 3 days. Freeze leftovers for up to 3 months. Thaw overnight in your refrigerator.

Sunday, July 21, 2013

Baby Food - Pears

hahahah these might have been a little sour for B Man.  He made the best face ever when he tried it!  He has come around and eats all of the pears when we give it to him - and it's better than just doing bananas cause he got a little constipated with those only for bfast time!

3 pears = 22oz

Bartlett pears are an ideal first fruit for babies - they're nutritious, soft, mild, and sweet. In late summer, peak season, pears may be so ripe that you don't have to cook them before you puree them. The ripest pear will smell sweet and have a yellow color that may or may not be accented with a rosy blush. Look for fruit that's firm and free of bruises and other blemishes. One medium pear yields about five ounces of puree

Wash pears with a mixture of three parts water and one part white vinegar to remove bacteria. Rinse under cool running water, dry, and peel. The easiest way to peel a pear is to use a vegetable peeler and work in a circular motion around the fruit. If you do not have a vegetable peeler, use a sharp paring knife.

Set the peeled pear, stem side up, on a clean cutting board. Slice in half, lengthwise. To remove the core, cup each pear half, one at a time, in your palm and cut in a shallow scooping motion with a paring knife or melon baller. Once the core is removed, finish slicing the pear into equal-sized slices and then quarter each slice.

If your pear is ripe, skip this step and move on to step 5. If you?re working with pears that aren't fully ripe, place the fruit in a steamer and cook for 3 to 5 minutes or until tender

Puree chunks of pear in a food processor or blender until smooth. Add water as needed to reach desired consistency.

For chunkier pear puree, which is ideal for babies 10 months or older, mash the pear with a potato masher instead of pureeing it.

Cool pear puree and refrigerate leftovers in BPA-free containers for up to 3 days. Freeze leftovers for up to 3 months. Thaw overnight in your refrigerator.

Thursday, July 18, 2013

Baby Food - Bananas

B man had his first fruit!!!  I'm not a HUGE fan of fruit (yes, I jsut said that) - I'm a veggie girl....so when the pediatriction said that it's smart to start with green veggies first - and slowly intro fruits later, since kids typically like the sweet stuff better - I had NO problem waiting to introduce B to fruit! But we are about 3 weeks in to Brody eating solids - and he is eating meals 3x/day - SO I decided to try bananas as his first fruit!  He L-O-V-E-D them!  I knew he would...they are pretty yummy!!  Now we have fruit to go with his cereal in the am!

5 bananas = 22oz

Wash the banana with a mixture of three parts water and one part white vinegar to remove bacteria. Rinse under cool running water, dry, and peel. Discard the peel and the ends of the banana. Slice the rest of the banana into pieces and then cut each piece into quarters.

Puree in a food processor or blender until smooth. (Fresh banana has a light purple-brown color when pureed.) Add water/breastmilk as needed to reach desired consistency.

Refrigerate leftover banana puree for up to 3 days. Freeze leftovers for up to 3 months. Thaw overnight in your refrigerator.

Tuesday, July 16, 2013

Baby Food - Carrots

I'm a freak!  Daycare gave Brody carrots today for lunch, cause he was still hungry after his bottle - and when she told me this I panicked because I hadn't introduced carrots yet.....I know, I know, I know....not a big deal for him to have canned baby food - BUT I want to be the one to introduce the food - and I want it to be the healthier version of it the first couple times!!  SO we rushed out and got carrots so I could make them up tonight for B...he totally liked homemade better; I just know it :)

5 carrots = 18oz

Rinse the carrot in cold water and peel with a veggie peeler. Remove greens. Dice into small pieces.

Bring water to a boil in a medium saucepan. Reduce heat (until bubbles are soft) and cook carrot until tender (about 10 to 15 minutes). Drain carrot and rinse with cold water for three minutes to stop the cooking process

Puree cooked carrot in a food processor or blender until smooth. Add water as needed to reach desired consistency. Once your baby is ready for finger foods, typically around 10 months, you can serve her carrot that's been cooked and cut into tiny pieces.

Cool carrot puree and refrigerate leftovers for up to 3 days. Freeze leftovers for up to three months. Thaw overnight in your refrigerator.

Monday, July 15, 2013

Baby Food - Avocado

Brody LOVED this!!  Just like his momma - he is going to love guac!  :)  We served this plain all week, but also combined with banana puree! (Talk about yumminess packed with omega-3 rich and potassium!!)

1 Avocado = 8oz

Wash avocado.  Slice down the middle, lengthwise, working around the pit. Twist each half of the avocado until it pulls apart. Use a spoon to pry out the pit, or stick the blade of a sharp knife into the pit and twist until the pit pops out. Cut slices lengthwise in the avocado just down to the skin and then peel the skin back. Or, scoop the flesh out of the avocado with a spoon.

Puree in a food processor or blender until smooth. Add water / breastmilk as needed to reach desired consistency.

Try to use all of the puree at once since avocadoes don't refrigerate or freeze very well. If you must refrigerate leftovers, seal them in an airtight container.

Saturday, July 13, 2013

Baby Food - Butternut Squash

Found Brody's new favorite food!!  He LOVES himself some butternut squash!  He kept wanting "more", "more" (insert baby sign language here) :)
 
1.5lb squash = 14oz

Look for butternut squash that is firm and free of cracks, bruises, or soft spots. If purchasing a package of peeled, cut butternut squash, choose squash with a deep orange color (the deeper the color, the riper and sweeter it is).

Rinse the butternut squash in cold water, scrubbing the skin with a small vegetable brush to remove dirt. If you've purchased pre-peeled and cut butternut squash, place in a colander and rinse with cold water.

Whole squash: Cut butternut squash in half lengthwise (leave skin on). Use a spoon to scoop out the seeds. Place squash on a baking sheet that has been brushed with a bit of olive oil and roast at 400F. Check the squash after 30 minutes to see if it is soft and can be easily scooped with a spoon. If not, keep adding 5 minutes of roasting time until it is. Remove squash from oven and scoop the flesh into a bowl. Allow it to cool.

Peeled and cut squash: Bring water to a boil in a medium saucepan. Add the squash pieces and cook until tender, about 15 minutes. Drain and rinse squash under cool water to stop the cooking process.

Puree butternut squash in a food processor or blender until smooth. Add water/breastmilk as needed to reach the desired consistency.

Cool butternut squash puree and refrigerate leftovers for up to 3 days. Freeze leftovers for up to 3 months. Thaw overnight in your refrigerator.

Wednesday, July 10, 2013

Broccoli and Garlic Flatbread

YAY!!  Cookbook tonight - LOVE!!!  We made up a couple flatbreads - This was SOOOO delicious!!  It leaves your house smelling like heaven too!!  It's just so easy to make and makes you feel like you are eating so healthy!!!  :)
 

Ingredients:
Flatbread / pizza dough
Broccoli - cut into bite size pieces
Spinach leaves - cut into bite size pieces
Asiago cheese (grated)
Garlic
Olive oil

Mix olive oil and garlic - and spread on top of the flatbread.  Then sprinkle with remaining ingredients and bake...Y-U-M-M-Y!!

Spinach and Artichoke Flatbread

Love me myself some flatbread!  This was really good - the blue cheese was my favorite part, but you could probably make this with any cheese you wanted!!!
 
 
Ingredients:
1lb of pizza dough
1/4 cup olive oil
3 large cloves garlic, minced
1 tablespoon fresh lemon juice
1 teaspoon dried basil
1 teaspoon freshly ground black pepper
1/2 teaspoon salt
1 package (10 ounces) frozen spinach, thawed and drained
2 cups (about two 7 ounce jars) marinated artichoke hearts, drained
4 ounces (about 1 cup) fresh mozzarella, sliced thin or grated
2-4 ounces blue cheese, broken into chunks
2 tablespoons pine nuts
2 tablespoons fresh basil, for garnish
 
Heat a small skillet over medium heat, add the olive oil and the garlic. Cook for one to two minutes, until the garlic is fragrant (PLEASE - watch closely!! Don't burn the garlic.). Remove from heat and add the basil, lemon juice, pepper and salt. Set aside.
 
After the dough has risen, punch it down and place it back on the floured surface. This amount of dough yielded 2 pizza crusts for my 12-inch cast iron skillet. If you're using an 8-inch skillet, you may get 3 crusts. Divide the dough evenly in half (or thirds). Roll out your dough just a little larger than the size of your skillet. Place on a large sheet of parchment paper.
 
Place an oven rack directly under your broiler and preheat your broiler to the highest setting. Additionally, place your cast iron skillet on the stovetop burner, turning the heat on high. You want to heat the skillet for 10 minutes. If it begins to smoke a lot, you can reduce the heat a bit. But you want it HOT.
 
While the skillet is heating, begin placing your toppings on your dough. Brush half of the garlic oil on each pizza and then scatter the spinach (make sure you squeezed your spinach of any excess liquid) evenly among both pizzas. Top with the mozzarella cheese, then the artichokes, then scatter on the blue cheese crumbles and finish with a sprinkle of the pine nuts.
 
When your skillet is hot carefully lift the pizza (holding onto the sides of the parchment paper) and place it in the skillet. Let it cook for no longer than 25 seconds. After 25 seconds turn the heat off and grab the skillet and pop it in the oven, right under the broiler. Broil for 1 minute, then using the potholder, grab the handle and rotate 180 degrees, broiling for only 1 more minute. Remove immediately and place on the stovetop. Carefully lift or slide the pizza out and repeat with the other pizza. Top both pizzas with fresh basil. Slice and serve!
 
*If you prefer to make the pizza completely in the oven just skip the skillet and broiler. Instead heat your oven to 350 degrees and bake your pizza for 25 to 30 minutes. Remove and top with basil. Let sit five minutes and slice and serve.

Tuesday, July 9, 2013

Baby Food - Green Beans

We introduced green beans to Brody as veggie #2 (started with sweet potatoes).  He currently is eating 1/2 servings of veggies with his rice cereal at dinner only, but figured we would make up enough to have a variety of veggies ready for when he is eating more frequently and more quantity.

10 oz frozen package = 10 (2T) servings

Ingredients:
1 package frozen organic green beans  (not as stringy as fresh, but fresh work too)
Water / breast milk

I just bought the microwave steam fresh bag - so microwaved for 5 minutes and DONE!

Rinse with water once done to stop the cooking process and then put right into a food processor.  Process and add a little water/breast milk until you reach desired consistency.  and DONE!!

I feed B 2 tablespoon servings, and then I put 2 days worth in the fridge - and freeze the rest in ice cube trays.  Just put the trays in a plastic baggie - and freeze overnight.  Then you just need to pop them out when you are ready to use them and microwave for your meal!

Tuesday, July 2, 2013

Baby Food - Sweet Potato

So B is eating solids now, and I figured I would blog his food diary - as well as "how to" for making  his baby food.  Other people might not be so "anal", but it's me....so let's be honest! I did so much research / reading - that I figured I would blog it for my next baby!!  :)

I'm still updating the spreadsheet - since we just started giving him solids on his 1/2 Birthday!; BUT here is the link and I'll just make my updates from here: Brody Food Diary

I attempted to make his food with a blender, cause I couldn't justify buying a food processor for the couple of months I would be making food......BUT the blender left food too chunky / stringy - so I bought a food processor and I LOVE IT!!  Best thing ever....and I like to cook - so I know I'll use it; right Ross?? :)

Anyways, I made up sweet potatoes first.

1 medium sweet potato = 8 (2T) servings

Ingredients:
1 sweet potato
Water / breast milk

Preheat oven to 400.  Wrap sweet potato with foil - prick it a couple times with a fork - stick in oven for 45 minutes (or until soft).

Let cool for a little bit - and then spoon out potato into food processor.  Process and add a little water/breast milk until you reach desired consistency.  and DONE!!

I feed B 2 tablespoon servings, and then I put 2 days worth in the fridge - and freeze the rest in ice cube trays.  Just put the trays in a plastic baggie - and freeze overnight.  Then you just need to pop them out when you are ready to use them and microwave for your meal!